Module 1 • Lesson 2🎚️ Camera Raw / ACR at Depth
A raw file isn't a photograph yet — it's a bucket of sensor measurements waiting for you to interpret them. Camera Raw is where scene-referred light (Lesson 1.1) becomes a graded master, and doing it in the right order, on the right profile, is the difference between a develop and a guess.
📚 What You'll Learn
By the end of this lesson, you will be able to:
- Explain why a raw file needs demosaicing and a camera profile before it's an image
- Develop in the correct order of operations: profile → WB → tone → color → presence → detail → optics
- Recover blown highlights and crushed shadows using raw headroom
- Use Clarity, Texture, and Dehaze deliberately, not reflexively
- Keep the whole develop re-editable via the Camera Raw Filter on a Smart Object
⏱️ Estimated Time: 60 minutes
🎯 Project (module deliverable base): A flat capture developed to a wide-gamut, 16-bit master with a documented, repeatable slider order.
In This Lesson
👤 The Goal: From Flat Capture to Master
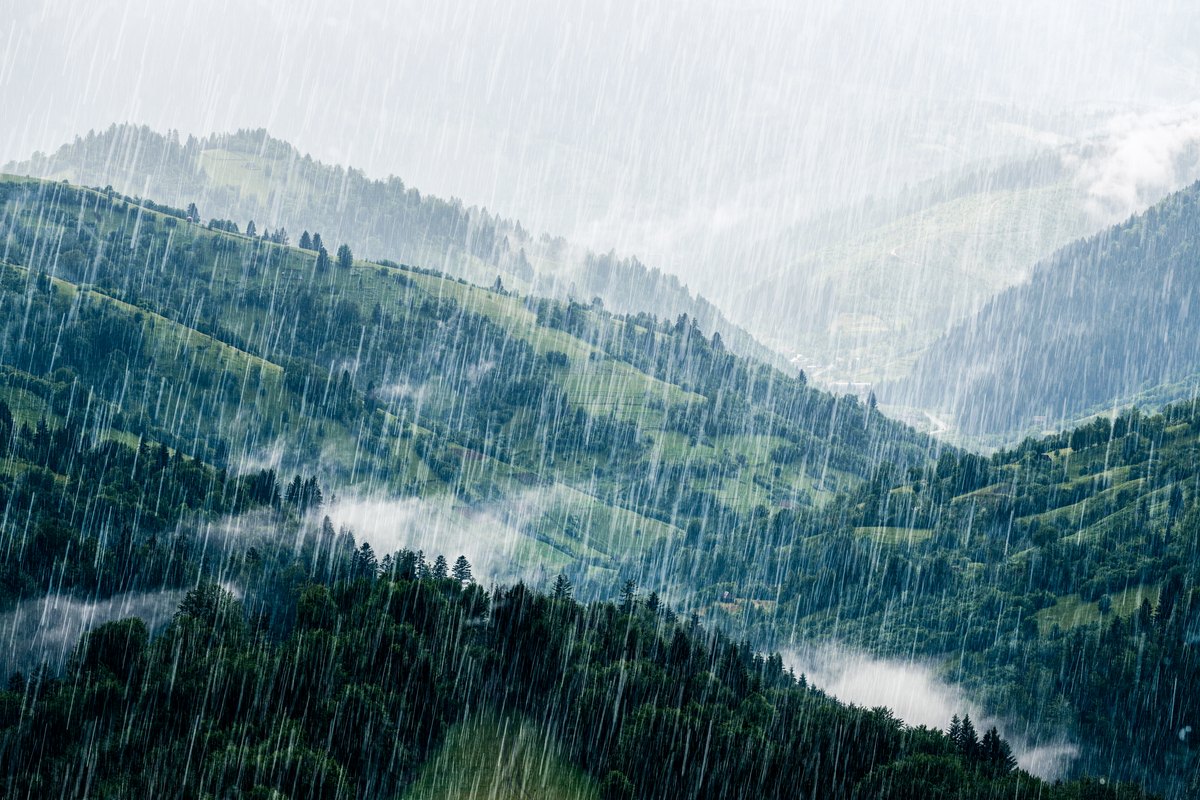
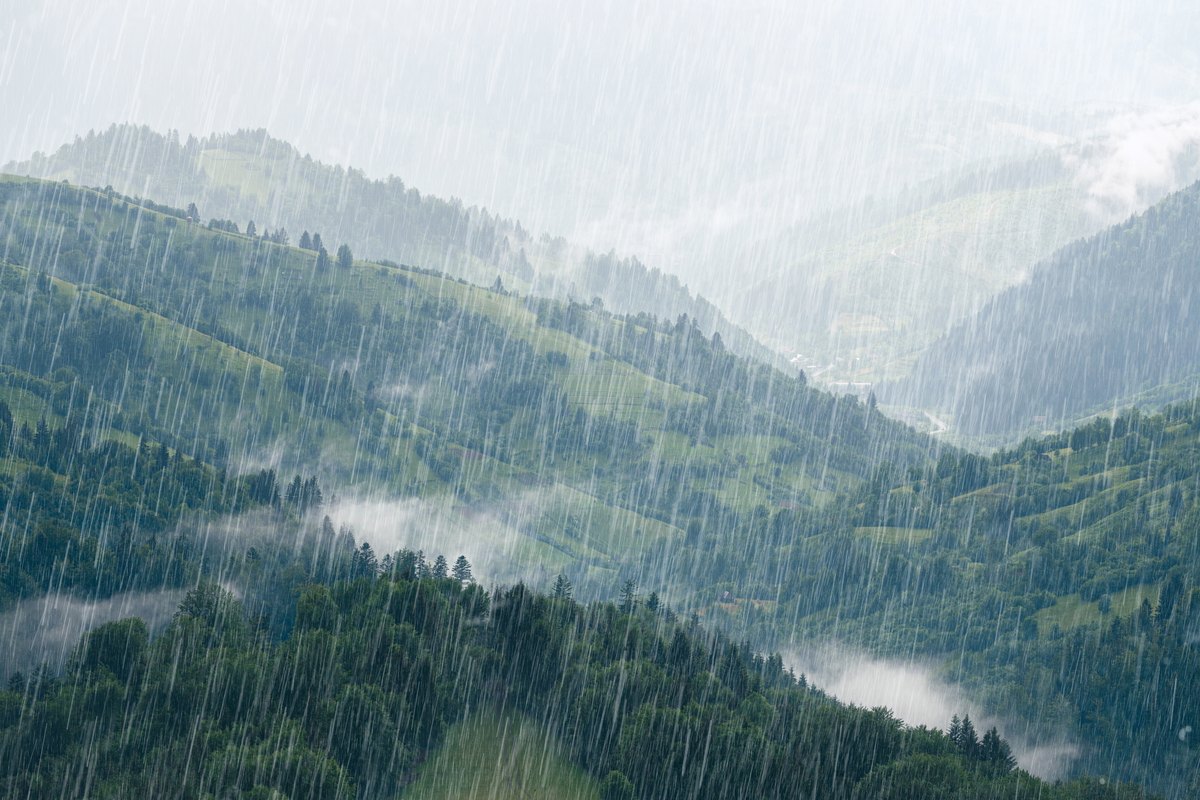
On the right, a flat, hazy capture — the honest, low-contrast starting point a good raw actually looks like. On the left, the same file developed: contrast recovered, greens deepened, haze cut, presence added. Nothing was invented; the information was always there, waiting to be interpreted. Drag the handle:
🧠 Mental Model: Raw Is Not a Photo
A raw file is the sensor's near-linear record of light behind a color-filter mosaic. Before you see an image, Camera Raw must demosaic it (reconstruct full color per pixel) and apply a camera profile that says how this camera's numbers map to real color. Change the profile — Adobe Color, Adobe Neutral, or a camera-matching profile — and you change the starting interpretation, before a single slider moves.
Because raw is near-linear and high-bit, it carries headroom: detail above and below what a JPEG would clip. That's why you can pull a bright sky back or open deep shadows in raw and get real texture, not gray mush. You are not painting light in — you are recovering measurements the JPEG would have thrown away.
🎛️ The Develop Order
The order matters: fix the foundation before the flourish. Camera Raw's Basic panel lists Profile and White Balance first, which is the right start. For tone, a reliable master sequence works from a rough overall Exposure to the ends (Whites/Blacks), then recovery (Highlights/Shadows), even though the panel lists those sliders in a different order:
⚠️ Presence sliders are seasoning, not sauce
Clarity, Texture, and Dehaze are seductive because they make an image "pop" instantly — and overused they scream amateur (crunchy midtones, haloed skies, gray shadows). Set exposure and color first; add Presence sparingly at the end, and check the shadows Dehaze just muddied.
♻️ A Re-Editable Raw Pipeline
The master move is to keep the develop alive. Instead of baking Camera Raw in, convert your layer to a Smart Object and apply Filter ▸ Camera Raw Filter. Now the entire develop is a Smart Filter: double-click to reopen every slider exactly where you left it, weeks later. Combined with a wide working space and 16-bit (see below, and Intermediate Lesson 2.1 for working spaces), this is a non-destructive develop you can revisit forever.
✅ Output wide and high-bit
When you open a true raw file, set Camera Raw's output to ProPhoto or Adobe RGB, 16 Bits/Channel. Click the workflow link under the preview (or the Convert and Save Settings/Preferences gear, depending on version) to open Workflow Options, set Color Space and Bit Depth, and tick Open in Photoshop as Smart Objects. You want maximum gamut and tonal headroom while you grade; convert down to sRGB only at delivery (Module 5). Grading in a narrow 8-bit space throws away the very headroom raw gave you.
🛠️ Guided Build: Develop a Flat Capture
Open a raw file. To practice the moves without one, open a flat JPEG or TIFF in the Camera Raw dialog (Windows: File ▸ Open As ▸ Camera Raw; Mac: File ▸ Open, then choose Camera Raw in the Format menu) rather than through Filter ▸ Camera Raw Filter: Workflow Options and Open Object in Step 4 only exist in the dialog. Raw-only features, such as the Adobe Color/Neutral and camera-matching profiles and lens profiles, still need a real raw file.
Step 1: Profile & white balance · 8 min
- Try Adobe Color vs Adobe Neutral and a camera-matching profile; pick the best starting point. (These are raw profiles: a JPEG or TIFF offers only Color, Monochrome and the creative profiles.)
- Set White Balance with the eyedropper on a neutral, then fine-tune Temp/Tint by eye.
Step 2: Tone from the ends in · 12 min
- Set a rough overall Exposure so the midtones sit about right.
- Set Whites and Blacks (hold Alt/⌥ while dragging to see the clipping thresholds), anchoring the full range.
- Recover with Highlights down and Shadows up, then refine Contrast and touch up Exposure if needed.
Step 3: Color & presence · 12 min
- Refine hues in the Color Mixer panel (HSL mode), for example separating foliage greens from cyans. Add a little Vibrance over Saturation.
- Add Texture/Clarity and a touch of Dehaze — sparingly. Re-check the shadows.
Step 4: Detail, optics, output · 8 min
- In the Detail panel, apply Sharpening and Noise Reduction while viewing at 100% zoom. In Optics, enable Remove Chromatic Aberration and Use Profile Corrections.
- With Workflow Options set to 16 Bits/Channel, ProPhoto or Adobe RGB, and Open in Photoshop as Smart Objects (or Shift-click Open to get Open Object), open the file. Save it as
develop_master.psd; double-click the Smart Object any time to reopen the develop. 🏆
✅ Project Completion Checklist
- ☐ Profile chosen deliberately; white balance neutralized
- ☐ Tone set: rough Exposure, then Whites/Blacks, then recovery
- ☐ Color Mixer/Vibrance refinement; Presence used sparingly
- ☐ Sharpening + NR + lens corrections applied
- ☐ Develop kept re-editable (Smart Object / Camera Raw Filter), 16-bit wide gamut, saved as a PSD
🧗 Now You: Solo Variation
🌟 Your challenge
- Develop one raw two ways — a natural, faithful version and an editorial one — from the same file, to feel how much a single capture holds.
- Deliberately over-recover a blown sky, then find the point where texture returns without going gray. That threshold is the file's real headroom.
- Build a Camera Raw preset from your favorite develop and apply it across a set, then tune per image. This is where automation (Module 6) will start.
Going further: compare the same raw developed in Camera Raw vs Lightroom vs a third-party demosaic. The differences in default profile and demosaic reveal how much "the look" starts before your first slider.
🍳 Recipe Card: The Develop
Develop in order
- Profile → White Balance (foundation first)
- Rough Exposure, Whites/Blacks to anchor, Highlights/Shadows recovery, then Contrast
- Color Mixer + Vibrance; then Texture/Clarity/Dehaze sparingly
- Sharpen + NR (Detail) and lens corrections (Optics), checked at 100% zoom
- Output 16-bit, wide gamut; keep it a Smart Object / Camera Raw Filter
Mantra: a flat raw is headroom — develop it in order, and keep the develop alive.
📓 Learning Journal
Add to your journal after this lesson:
- Key concepts you learned
- Techniques that clicked for you
- Questions or confusion points to revisit
- Ideas you want to try
- Your progress and feelings about learning this
✍️ This lesson's prompt: Write your personal develop order as a checklist. Having a fixed sequence is what makes your results repeatable instead of lucky.
📝 Lesson Summary
🎓 Key Takeaways
- A raw file is near-linear sensor data that needs a demosaic and a camera profile before it is an image.
- Raw carries headroom a JPEG has already clipped; recovery works because the data is still there.
- Develop in order: profile and white balance, tone (Exposure, Whites/Blacks, recovery, Contrast), color, presence, then detail and optics.
- Keep the develop re-editable as a Smart Object, in 16 Bits/Channel and a wide color space.
🎉 What You've Accomplished
You took a flat capture to a graded master with a documented, repeatable slider order, and you saved it as a Smart Object you can reopen and change weeks from now. That order is what makes your results repeatable instead of lucky.
❓ Common Questions at This Stage
Camera Raw Filter on a JPEG: is that "cheating"?
It's a legitimate way to use ACR's tools on any layer, and great for practice. But a JPEG has already clipped and gamma-baked, so you won't get raw's recovery headroom. For real latitude, develop the actual raw file.
Which camera profile should I default to?
Adobe Color is a sensible, punchy default; Adobe Neutral gives a flatter base for heavy grading; camera-matching profiles mimic your camera's JPEG looks. Pick per project, and remember it's a starting interpretation you can always change.
🔭 Looking Ahead
You can develop a single capture to a high-bit master. Next you push the container to its limit: Lesson 1.3: 32-bit, HDR & Blend-Mode Math, where you merge exposures into true floating-point light and learn what your blend modes are actually computing.
✅ Before the Next Lesson
- Save your develop as
develop_master.psdwith the Smart Object intact. - Write your personal develop order as a checklist.
- Shoot or find an exposure bracket (−2 / 0 / +2) of a high-contrast scene for Lesson 1.3.
- Write your Learning Journal entry.
📚 Additional Resources
🌟 Encouragement for the Journey
A fixed develop order feels slow the first few times and then becomes invisible. Every raw you open from now on starts from a better place because of the habit you built today.